Your Own Treasure Chest Adventure
X Marks the Spot (for Your Keepsakes!): DIY Treasure Chest Fun!
PRINTABLE MATERIALSCHILDREN'S PROJECT
8/29/20253 min read


Let's Make a Treasure Chest!
Remember the thrill of the treasure hunt in El Rancho Chocolaté? Berta, Rita, and Elda searched high and low for a family treasure, and when they found it, it wasn't gold or jewels, but something even more special: milagros that told their family's story. Well, now it's your turn to create a special place for your most important treasures!
Join us for a super fun DIY Treasure Chest Box crafting event! This project is all about making a special box to hold something that has deep meaning to you—whether it's a tiny note from a friend, a shiny pebble from a favorite trip, or a drawing that makes you smile.
What You'll Need:
Our pre-printed treasure chest template (scroll down to the bottom of this article for the printable template).
A color printer
Scissors ✂️
Double-sided sticky tape (or glue stick)
Let's Go:
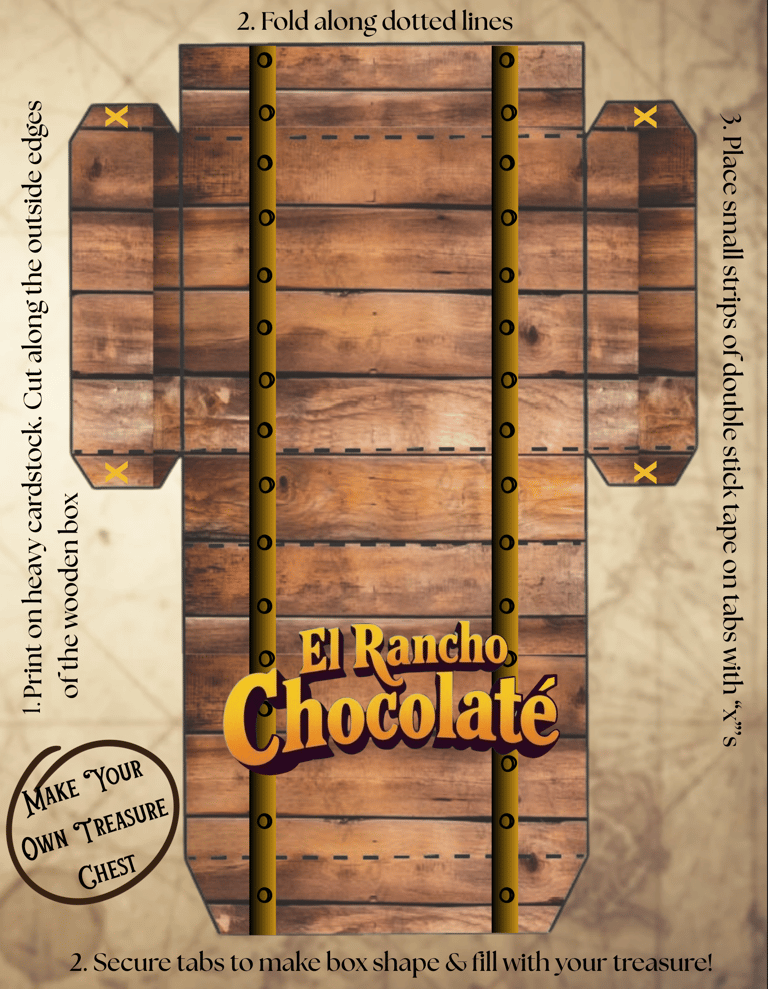
Print Your Treasure Box! First, print out our one of a kind treasure chest template below.
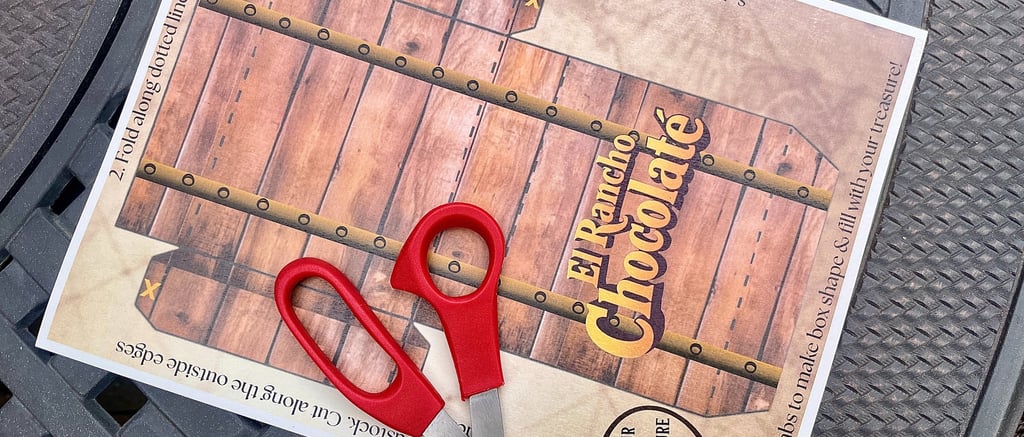
Cut it Out: Carefully use your scissors to cut around the outside edges of your treasure chest template. This step is like drawing the map outline for your own treasure!
Fold and Form: Now, look for the dotted lines on your template. These are your folding lines! Gently fold along all the dotted lines to start giving your flat paper some shape. You'll begin to see your treasure chest come to life!
Sticky Situation! Grab your double-sided sticky tape. You'll see little tabs marked with "x"'s on your template—these are where the tape goes. Apply tape to all the tabs. If you don't have double-sided tape, a glue stick works well too (just hold the tabs for a moment while the glue sets).
Seal the Deal: Carefully press the taped tabs onto the matching parts of the treasure chest to secure its shape. Once everything is stuck together, you'll have your very own small treasure box, just waiting to be filled!
Tips to Personalize Your Treasure Chest:
Decorate with Drawings & Stickers: Before you fold and tape, let your imagination run wild! You can use fun stickers like cacti, locks and keys, jewels and coins This is where your treasure chest truly becomes yours.
Add Some Shine: Make your treasure chest sparkle! Use glitter glue, metallic markers, or even stick on small rhinestones to give it a truly dazzling look. Every good treasure chest should shimmer with mystery and riches!
Give it a Name: What's your treasure chest's name? Will it be "My Secret Stash" or "My Memory Keeper"? Write the name clearly on the lid or front of the box. You can even use different fonts or colorful letters to make the name stand out.
Create a Lock & Key (Decoration!): While it won't actually lock, you can draw a fancy keyhole on the front and even cut out a paper key to attach with a string. This adds to the illusion that your treasure inside is super secret and valuable!
Make Your Own Pattern: If you truly want your treasure chest to be different, you can cut out the template and then use it as a pattern to cut out other "boxes" from different heavy card-stock making it super one of a kind.
What's Your Treasure?
Now for the best part: deciding what important treasure to keep inside! Just like the milagros in El Rancho Chocolaté told a story, your treasure can be anything that's special to you. It could be a photo, a small toy, a special message, some chocolates, a special piece of jewelry, or even a collection of tiny nature finds.
This craft is more than just making a box; it's about thinking about what truly matters to you and creating a special place to keep those memories and feelings safe. Happy crafting, treasure hunters!


